
How to Set Fence Posts in Concrete That Never Lean
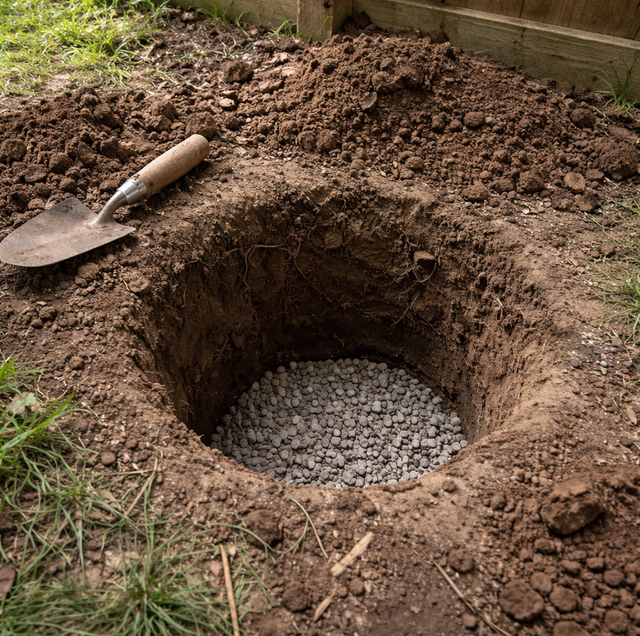
Quick Answer: A fence post is set correctly when about a third of its length sits below grade (past the frost line), the hole is roughly three times the post's width, a few inches of gravel sit under the post for drainage, and the concrete is crowned above grade to shed water. Brace it plumb and let the concrete cure before hanging any panels.
Every fence panel, rail, and picket hangs off a row of posts sunk into the ground. Those posts are the only part of the fence that touches the earth, and they carry the entire structure: the weight of the panels, the push of the wind, the pull of a gate swinging open a few thousand times a year. Get the posts right, and the fence stays straight for decades. Get them wrong and the whole line starts to lean, sag, or heave no matter how good the panels are.
The Post Is the Foundation, Not Just a Stake
Before any talk of concrete, it helps to see what the post actually does. A fence is a tall, flat object standing in open air, which makes it a sail. Wind loads it, gravity loads it, and a gate hangs off it with a long lever's worth of force. All of that force travels down the post and into the soil around it. The concrete's job is to spread that force out so the soil can hold it.
A house sits on a footing that spreads its weight across a wide base. A fence post works the same way in miniature. The concrete collar around the buried section is the footing, and everything above it is only as steady as that footing is deep, wide, and well drained. Skimp on the buried third and you have not saved money; you have built a fence that will need resetting in a few years.
How Deep the Post Should Go
The working rule most fence crews use is to bury about one third of the total post length. A standard 6-foot fence uses an 8- or 9-foot post so that roughly 2.5 to 3 feet sits underground. Taller fences and heavier panels want proportionally deeper holes.
Depth also has to clear the frost line, the level to which the ground freezes in winter. When soil freezes, it expands, and if the base of a post sits inside that freezing zone, the ground can lift the post a little each cold snap. Over several winters, that repeated lifting, called frost heave, walks a post upward and out of line. Setting the base below the frost line keeps it anchored in soil that stays stable year-round.
Gate and corner posts go deeper: Not every post carries the same load. Line posts in the middle of a run mostly resist wind. Corner and end posts take the sideways pull of the fence tensioning against them, and gate posts take the worst of it: the constant swing and slam of the gate plus the weight of the frame hanging off one side. Set those deeper and often wider, sometimes a foot more than the line posts, because a leaning gate post is the single most common failure on an otherwise sound fence.
Hole Diameter and Shape
A good rule for width is a hole about three times the post's face. A 4x4 wood post, which is 3.5 inches across, wants a hole around 10 to 12 inches wide. The extra width gives the concrete collar enough mass to grip the surrounding soil.
The shape of the hole matters as much as the width. The best holes are slightly wider at the bottom than the top, like an upside-down flowerpot. That bell shape locks the concrete plug into the ground so frost cannot lift it, because the flared base has more soil sitting on top of its shoulders. A hole that is wider at the top than the bottom does the opposite and practically invites heave.
Why Water at the Base Is the Real Enemy
Most failed posts do not fail because the concrete was weak. They fail because water collected at the bottom of the hole and stayed there. Standing water does two destructive things. Against a wood post, it feeds rot, softening the exact section that carries the whole load. In freezing weather, that trapped water expands and pries the post upward, the same frost heave that shallow setting invites.
Water pooling at the base is what fails most posts, not weak concrete. Pour a few inches of gravel into the bottom of the hole before setting the post so groundwater drains away instead of collecting against it, then crown the concrete an inch or two above grade so rain sheds off the collar rather than soaking down alongside the post.
Mixing, Pouring, and Crowning the Concrete
With the post seated on gravel and held plumb, the concrete goes in around it, not under it. Fast-setting fence-post mix can be poured dry into the hole and soaked with water, or mixed to a thick oatmeal consistency first and shoveled in. Either way, work it down with a stick or rod to chase out the air pockets that would otherwise leave weak voids in the collar.
Crown it above grade: The last few inches are where a lot of otherwise good work goes wrong. Instead of stopping the concrete flush with the ground, build it up an inch or two above grade and slope it away from the post on all sides, like a small cone. That crown sheds rain outward so water runs off the collar rather than sitting on top of it and soaking down alongside the post. Finishing the concrete flat or, worse, in a little dish that traps water defeats the whole drainage strategy and puts standing moisture right where the post is most vulnerable.
Bracing Plumb While It Cures
Concrete does not grab instantly. Until it sets, the post can drift out of vertical from its own weight or a bump. Check the post for plumb on two adjacent faces with a level, then hold it there with temporary braces, two scrap boards staked to the ground at right angles, screwed to the post. A post set a couple of degrees off looks fine on its own but reads as a crooked, wandering line once the whole run is up and the panels go on.
Give the concrete time before you load it. Most fence-post mixes are firm enough to stand in a few hours but are nowhere near full strength that soon. Waiting 24 to 48 hours before hanging panels or a gate lets the concrete reach enough cure that the post can take the load without shifting. Rushing this step is a quiet way to end up with a lean that only shows up weeks later.
Wood, Metal, and Vinyl Posts Are Not the Same
The setting basics carry across, but the material changes the details.
Wood posts: Wood is the one that rots, so everything about drainage matters most here. Use pressure-treated posts rated for ground contact, keep the gravel base, and crown the concrete hard. The classic mistake, covered below, is backfilling loose soil against a wood post so moisture sits against it.
Metal posts: Steel and aluminum posts do not rot, but steel can corrode where it meets moisture, so a gravel base and a crowned collar still pay off. Many metal systems set the same way in concrete; some use a hollow post that wants a little concrete inside the base as well to add rigidity.
Vinyl posts: Vinyl posts are hollow sleeves and are surprisingly floppy on their own, so they rely almost entirely on the concrete inside and around them for stiffness. Many vinyl systems call for filling the post cavity with concrete over a length near the base, or setting an internal support, so the sleeve does not flex or oil-can in the wind.
Common Mistakes That Sink a Fence
A handful of errors account for most leaning fences, and every one of them traces back to the setting stage.
Setting too shallow. A post buried only a foot or so has almost no grip against wind or frost and will start to lean within a season or two.
No drainage under the post. Skip the gravel, and water collects in the bottom of the hole, rotting wood and heaving posts of any material.
Backfilling a wood post with soil. Packing dirt against the buried wood instead of using a proper collar keeps damp earth pressed to the post continuously, which is a recipe for rot at the ground line.
Trapping water at grade. Concrete finished flat or dished, rather than crowned, holds rain against the post and undoes the whole drainage plan.
Weather Cuts Both Ways, All Year
It is tempting to think of frost as the only weather threat, but the ground works on a post in every season. In cold months, freeze-thaw cycling expands and contracts the soil and any trapped water, prying at a shallow or poorly drained post. In warm, wet-then-dry stretches, clay soils swell when saturated and shrink as they dry out, and that repeated wet-dry movement loosens a post's grip on the ground just as surely as frost does. A post set deep, drained with gravel, and crowned against standing water resists both patterns, which is why those steps are not seasonal tricks but year-round insurance.
A Few Safety Notes Before You Dig
Setting posts is physical work with a couple of real hazards worth respecting.
- Call 811 before you dig: It is a free service that marks buried utility lines, gas, electric, water, and cable, so an auger or digging bar does not hit something dangerous.
- Treat wet concrete as caustic: It burns skin and eyes on contact, so wear gloves and eye protection and rinse off any splashes promptly.
- Respect the equipment and the hole: Powered augers can kick and twist hard enough to injure, and a deep, narrow hole can collapse or trap a limb, so work carefully and do not overreach.
- Check property lines and permits: Rules and setback requirements vary by locality, so confirm where the line legally sits and whether a permit is needed before the first hole goes in.
Setting posts carries real hazards. Call 811 first so an auger or digging bar does not strike a buried gas, electric, or water line. Treat wet concrete as caustic, since it burns skin and eyes; wear gloves and eye protection, and rinse off splashes promptly. Powered augers can kick hard enough to injure, and a deep, narrow hole can collapse or trap a limb.
Frequently Asked Questions
Yes, and in some soils it is preferred. A post tamped in with layers of compacted gravel drains freely and can be re-plumbed later without breaking out a concrete plug, which is why some crews use it for wood posts in wet ground. The trade-off is less rigidity, so gates and corners still tend to get concrete even on a gravel-set fence.
For a typical 4x4 in a 10-inch hole about 2.5 feet deep, plan on roughly one to two 50-pound bags of fast-set mix per post. Wider holes for gate and corner posts, or 6x6 timbers, can push that to three bags. Buying a bag or two extra beyond the count is cheaper than stopping a pour halfway to make a store run.
Fill from the gravel base up to the crown so the collar surrounds the full buried length. A common shortcut, a shallow concrete cap over dirt backfill, leaves the lower post sitting in soil that shifts and drains poorly, which is exactly the weak setup this whole method avoids.
Fast-set post mix is formulated to firm up in 20 to 40 minutes and can be poured dry and soaked in the hole, which lets you brace and move on quickly. Standard concrete mix is stronger long-term but stays workable for hours and needs proper mixing, so it suits large jobs where you set many posts before any single one has to hold load.
Push firmly on the top of the post. A correctly set post barely moves, while one that rocks at the base or shows a gap opening at the ground line on one side is loose. A dark, soft, or crumbling ring right at grade on a wood post points to rot from trapped moisture, the classic sign of a missing gravel base or a flat, water-holding collar.
On a slope, you keep every post vertically plumb, never tilted to match the grade, and let the panels step or rack down the hill between them. The uphill side of each hole tends to shed water toward the post, so crowning the concrete and sloping the surrounding grade away matters even more on a hillside than on flat ground.
Get a free on-site consultation before your next fence goes in — proper post-setting is what keeps a fence plumb for decades. The Fayetteville Fence Company LLC serves Fayetteville, Hope Mills, and Raeford. Call (910) 994-3634.
