
How to Stain or Seal a Wood Fence: 9 Steps That Last
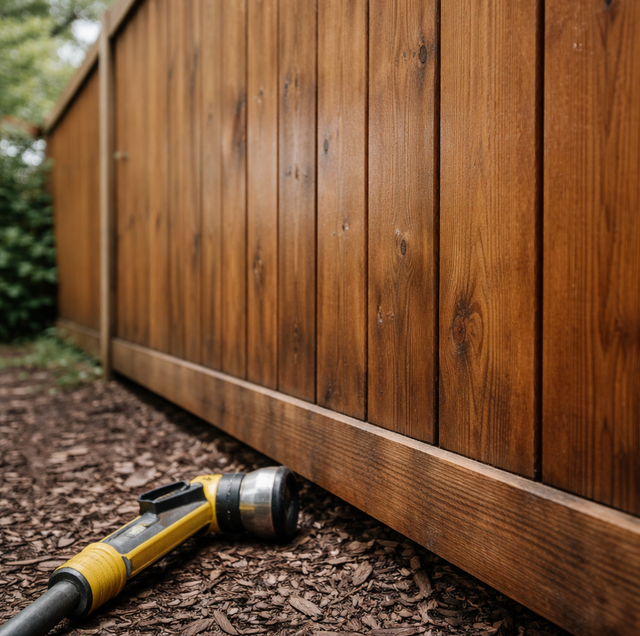
Wood fencing looks solid, but under the surface it behaves like a bundle of tiny straws. The grain is full of open pores that pull in water when it rains and let it evaporate when the sun comes out. Every time the wood swells and shrinks through that cycle, the boards cup, split, and loosen at the fasteners. Sunlight does its own damage: ultraviolet rays break down lignin, the natural glue that holds wood fibers together, which is why an unfinished fence fades to that silvery gray within a season or two.
A stain or sealer stops both problems at once. A penetrating finish soaks into those open pores and lines them so liquid water beads off instead of soaking in, while the pigment and additives block the UV that would otherwise cook the surface. The result is a fence that stays dimensionally stable, holds its color, and resists the rot and mildew that follow trapped moisture. Getting there is less about the product you grab and more about prep, timing, and how you work the finish into the wood.
Quick Answer: Let new or pressure-treated wood dry until it accepts water instead of beading it, clean off dirt and mildew, then apply a penetrating semi-transparent stain (more pigment means more UV protection) on a dry, mild day. Back-brush every coat into the grain, hit the end grain and both faces, and recoat when water stops beading.
Why Finishing Matters More Than the Boards You Bought
You can install premium cedar or pressure-treated pine and still watch it fail early if the wood is left bare. Bare wood has no defense against the two forces that age it fastest. Water is the obvious one, because saturated fibers feed the mold and decay fungi that soften a post from the inside. The one people miss is sunlight. UV degradation is surface-deep, but once the top fibers break down, they wash away in the next rain and expose fresh wood to the same attack, so the fence keeps thinning and graying year after year.
A finish is a maintenance decision, not a cosmetic one. The pigment is what carries the UV protection, and that single fact drives the choice you make next.
Clear Sealer, Semi-Transparent, or Solid Stain
The three finish families trade visible grain for durability, and the deciding factor is pigment load.
Clear sealer: A clear water repellent blocks moisture and shows off the natural wood color. The catch is that clear products carry little or no pigment, so they give the weakest UV protection and usually need reapplying every year or two. They suit a brand-new fence you want to keep looking natural, as long as you accept the shorter recoat cycle.
Semi-transparent stain: Semi-transparent stain is the workhorse for fencing. It adds enough pigment to filter UV and slow graying while still letting the grain and texture read through. Most fences land here because it balances protection against appearance and tends to fade rather than peel, which makes future recoats easier.
Solid stain: Solid stain is nearly opaque, closer to a thin paint, and its heavy pigment load gives the most UV defense of the three. It hides grain and can cover a weathered fence uniformly. The trade-off is that solid film-forming finishes can peel if water gets underneath, so surface prep matters even more with the heavier options.
The rule to carry away: UV protection climbs as pigment climbs, and appearance is what you trade for it.
Let the Wood Dry Before You Finish Anything
Two kinds of moisture will ruin an early finish job.
New pressure-treated lumber arrives wet with the waterborne chemicals used to preserve it, and that moisture has to leave before a penetrating finish can soak in. Coat it too soon, and the product sits on top and flakes off. Depending on how the boards were stored, waiting several weeks to a few months is common. A quick field test settles it: sprinkle water on the wood, and if it soaks in within a minute or so, the fence is ready; if it beads and sits, the wood is still too wet or too dense to accept a finish.
The second kind is rain. Even seasoned wood needs to dry out fully after a storm, because the outer surface can look dry while the fibers underneath are still holding water. Give the fence a couple of dry days after any significant rain before you start. Sealing water into the wood traps exactly the moisture the finish is supposed to keep out.
Clean and Strip First, Because Finish Only Bonds to Sound Wood
A finish is only as good as the surface under it. Grime, mildew, and loose old coating all block penetration and take the new finish with them when they let go.
Wash off dirt and mildew: Scrub the boards with a dedicated wood cleaner or mildew remover, then rinse. Mildew shows up as black or gray speckling, and if you paint over it, the spores keep growing under the film. A garden pump sprayer and a stiff brush handle most fences; a pressure washer works but only on a low, fanned setting held well back, since a tight stream gouges soft grain and leaves fuzz that has to dry and be sanded.
Remove flaking or glossy old finish: Wherever an old finish is peeling, scrape and sand back to sound wood so the new coat has something to grip. A glossy or slick surface should be dulled so the finish can key into it. Let everything dry completely after washing before you move to application.
Pick the Weather Window Carefully
Finishing is a two-sided weather problem, and both mistakes cause the same failure: finish that never bonds.
Working in direct hot sun is the first trap. Heat flash-dries the surface before the liquid can migrate down into the pores, leaving lap marks and a film that sits on top instead of soaking in. Follow the shade around the fence, or work on an overcast, mild day so the finish stays open long enough to penetrate.
The other side is applying with rain or cold on the way. Most finishes need dry hours to cure, and a shower before they set will streak or wash off fresh product. Cold slows curing to a crawl and can stop it entirely below the product's minimum temperature. Aim for a dry stretch, moderate temperature, and low wind, and check the label for the temperature and cure-time range the manufacturer specifies.
Apply It So It Actually Soaks In
The application itself is where a fence gets its years back, and the single most important move is back-brushing.
Choose your applicator: A brush gives the most control and works finish into the grain naturally. A roller covers flat pickets faster. A pump or airless sprayer is fastest of all on a long run, but spraying alone tends to lay finish on the surface rather than driving it in. Spray to apply, then immediately brush over the wet finish to work it into the wood. If you spray, wear eye protection, because overspray and drift will find your eyes, and mask or move anything downwind.
Back-brush every coat: Back-brushing means dragging a brush along the grain through the wet finish right after it goes on. It pushes the liquid into the pores, evens out heavy spots, and eliminates the lap marks that spraying or rolling leave. Work one board or a small section at a time, keeping a wet edge so each pass blends into the last.
Back-brushing is the move that gives a fence its years back. If you spray or roll the finish on, immediately drag a brush along the grain through the wet coat to push the liquid into the pores, even out heavy spots, and remove lap marks. Work one board or small section at a time and keep a wet edge.
Do not skip end grain and back faces: End grain, the exposed cut ends at post tops and rail ends, drinks up water far faster than the flat faces because the pores open straight out. Flood those cuts and brush the finish in. Coat both sides of the fence too; the side facing away still takes sun and rain, and a one-sided finish lets the panel absorb and release moisture unevenly, which is a recipe for cupping.
Recoat Intervals and Reading the Signs
No finish is permanent, and the smartest maintenance move is watching the fence tell you when it is thirsty. Semi-transparent stains generally hold two to four years before they need refreshing, clear sealers often ask for attention every year or two, and solid stains can go longest, though a peeling film needs prep before it can be recoated.
The clearest signal is the water test. Splash a little water on the boards, and if it beads and rolls off, the finish is still working; if it soaks in and darkens the wood, the repellency is gone, and it is time to recoat. Fading color, a chalky feel, and returning gray are the other tells. Recoating a semi-transparent finish on schedule is usually a light clean and a fresh coat, no stripping, because it faded rather than peeled. Waiting until the wood is bare and rough turns an easy afternoon into a full strip-and-sand job.
A Quick Word on Working Safely
A fence job is low-drama until it is not. If any part of the fence needs a ladder, set it on firm level ground and keep three points of contact rather than reaching. Keep the finish and any cleaners off nearby plants and away from pets, rinse or cover greenery you cannot avoid, and keep animals clear of the fence until everything is dry to the touch per the label.
Cloths soaked in oil-based stain can heat up on their own and catch fire as the oil cures. Never wad them in a pile or a trash can. Lay them flat outdoors to dry fully, or seal them in a metal container with water, then dispose of them as directed on the label.
Frequently Asked Questions
Paint forms a hard film on the surface rather than penetrating, and on a fence that flexes and holds ground moisture, that film tends to blister and peel from the back as trapped water pushes out. Fasteners and joints also crack a paint film as boards move. A penetrating stain flexes with the wood and fades instead of peeling, which is why finishes made for fencing are formulated to soak in rather than coat over.
Oil-based finishes penetrate deeply and are forgiving to apply, but they cure slowly, and their rags pose the spontaneous-combustion risk noted above. Water-based finishes clean up with soap and water, dry faster, and hold color longer against UV because modern pigments resist fading well. Never brush a water-based coat directly over an old oil-based one without checking compatibility; adhesion can fail where the two meet.
Darker, more heavily pigmented tones mask existing gray and blotchiness far better than light or clear finishes, because the pigment both covers and shields. On a fence that already has uneven weathering, a semi-transparent stain in a medium-to-dark tone or a solid stain evens out the look, whereas a clear sealer will lock in whatever discoloration is already there.
Coverage runs roughly 150 to 250 square feet per gallon on smooth wood, but a fence eats far more than a flat wall because you are coating two faces plus all the picket edges and post tops. Rough-sawn or older thirsty wood also drinks more. Measure the total length by the height, double it for both sides, and buy a bit extra so you can keep a wet edge without running out mid-panel.
Cedar and redwood carry natural oils that resist decay and insects better than untreated pine, but that resistance does nothing against UV. Left bare, they still gray out and lose surface fibers to sunlight within a season or two. A finish preserves their color and slows the surface erosion; the rot resistance is a bonus, not a substitute for UV protection.
Yes, but keep the finish off the galvanized or coated metal, because stain does not bond to it and will smear or peel off the hardware. Tape or shield post caps, brackets, and hinges before you spray, or cut in carefully with a brush around them. Wipe any accidental overspray off metal while it is still wet, since dried stain on hardware is stubborn to remove cleanly.
Skip the guesswork and get a fence built to hold a finish for years — The Fayetteville Fence Company LLC installs quality wood fencing that ages well. The Fayetteville Fence Company LLC serves Fayetteville, Hope Mills, and Raeford. Call (910) 994-3634.
